
Best Practices For Handling Large Audio Files
Handling large audio files is challenging due to issues like storage limits, slow transfers, and platform restrictions. Here's how to manage them effectively:
- Reduce File Size: Adjust bitrate and sample rate. For speech, use 16 kHz and 64–96 kbps in mono. For music, aim for 128–192 kbps.
- Choose the Right Format: Use MP3 or AAC for smaller files with acceptable quality. FLAC or ALAC works for lossless needs.
- Check Compatibility: Ensure the correct channel count (mono/stereo) and avoid lossy-to-lossy conversions (e.g., MP3 to AAC).
- Organize Files: Use clear naming conventions and keep unaltered backups.
- Use Tools Like ConvertHub: Convert and compress files efficiently, especially for batch processing.
Proper file management and format selection can save time, avoid errors, and maintain audio quality.
What Makes Audio Files Large and Why It Matters
Factors That Increase Audio File Size
Several technical aspects influence the size of audio files. One key factor is the sample rate, which refers to how many audio snapshots are captured each second. For example, CD-quality audio uses a sample rate of 44,100 Hz, while high-resolution recordings can go as high as 192,000 Hz. Another important element is bit depth, which determines the number of bits used to represent each sample. This affects the audio's dynamic range - standard recordings typically use 16-bit, while professional studios often work with 24-bit.
These two factors combine to determine the bitrate, which is essentially the amount of data processed per second of audio. Additionally, the channel count has a direct impact on file size. A stereo file, for instance, is about twice the size of a mono file, and a 5.1 surround sound file with six channels can be even larger.
The type of compression used also plays a significant role. Uncompressed formats like WAV store all the original audio data, resulting in very large files. Lossless compression formats such as FLAC or ALAC can shrink file sizes to about 40–50% of their original size without losing quality. On the other hand, lossy formats like MP3 or AAC reduce file sizes dramatically - down to as little as 5–20% of the original - by eliminating inaudible data. For instance, a high-quality audiobook might take up around 30 MB per hour, while a single high-resolution audio track can exceed 100 MB.
Understanding these technical factors is essential for managing large audio files effectively.
Problems You'll Face with Large Audio Files
Dealing with large audio files can create numerous challenges, especially in day-to-day workflows. One of the most common issues is slow transfer speeds. Using an online file converter to change formats can help mitigate this.
"Streaming hi-res audio is notoriously bandwidth-needy and requires a strong internet connection".
Even playing a single audio stream at 192 kBps can push the limits of weaker networks. Emailing large audio files often hits attachment size limits, and uploading them to cloud storage can take hours depending on your internet speed.
Storage space is another concern. For example, professional editors working with uncompressed WAV files - which can use roughly 10 MB per minute - may quickly run out of hard drive space. Additionally, workflow disruptions are common when files are too large to share easily or exceed platform limits. Even using ZIP files to compress and transfer audio across different operating systems can sometimes result in file corruption.
These challenges emphasize the need for efficient storage and transfer solutions when working with large audio files.
How to Compress Audio File Without Losing Quality
How to Reduce Audio File Size Without Losing Quality
When it comes to shrinking audio file sizes while keeping the quality intact, fine-tuning your settings and choosing the right formats are key.
Adjusting Bitrate and Sample Rate
Tweaking the bitrate and sample rate can significantly lower file sizes. The bitrate controls how much data is processed per second of audio - higher bitrates mean better sound but larger files. Most people won’t notice a drop in quality until the bitrate dips below 90 kbps. Gus Berry highlights this importance:
"Bitrate is going to determine audio fidelity. You could have the greatest-sounding recording of all time, but if you played it with a low bitrate, it would sound worse on the other end."
For speech-heavy content like podcasts, a sample rate between 16 kHz and 44.1 kHz paired with a bitrate of 64–96 kbps in mono is usually enough. This keeps files small enough to meet platform limits - like Apple Podcasts’ 150 MB cap for cellular downloads - while ensuring clear voice quality. For music, aim for 128–192 kbps for casual listening or 256–320 kbps for near-CD quality.
Another tip: convert stereo audio to mono for voice recordings. This simple switch can cut file sizes in half without affecting clarity. Additionally, using Variable Bitrate (VBR) instead of Constant Bitrate (CBR) can help. VBR adjusts the bitrate dynamically, allocating more data to complex audio sections and less to quieter moments, striking a balance between size and quality.
Next, let’s dive into how compressed formats can help shrink file sizes even further.
Choosing Compressed Audio Formats
Compressed formats are a game-changer for reducing file sizes. Lossy formats like MP3 and AAC rely on psychoacoustic models to strip out sounds that are less noticeable to the human ear. For example, MP3 at 128 kbps can discard up to 90% of the original data, while 320 kbps removes about 60%. At higher bitrates, most people won’t detect any quality loss.
Among lossy options, AAC often outperforms MP3 at the same bitrate and is widely used on platforms like YouTube and iTunes. However, for maximum device compatibility, MP3 at 256–320 kbps remains a reliable choice.
If maintaining original audio quality is non-negotiable, lossless formats like FLAC or ALAC are the way to go. These formats shrink file sizes by 40–60% without sacrificing any data, making them ideal for archiving music collections or professional projects.
One crucial rule: avoid converting from one lossy format to another (e.g., MP3 to AAC). Doing so compounds data loss and noticeably reduces quality. Always start with uncompressed or lossless files when converting to ensure the best results.
Selecting the Right Audio Format and Codec
Audio File Format Comparison: Size, Quality, and Best Use Cases
Once you've reduced file size without sacrificing quality, the next step is choosing the right audio format and codec. Your choice depends on your specific needs - whether you're prioritizing top-notch quality for editing, efficient storage for archiving, or compact files for online sharing.
Common Audio Formats and Their Ideal Uses
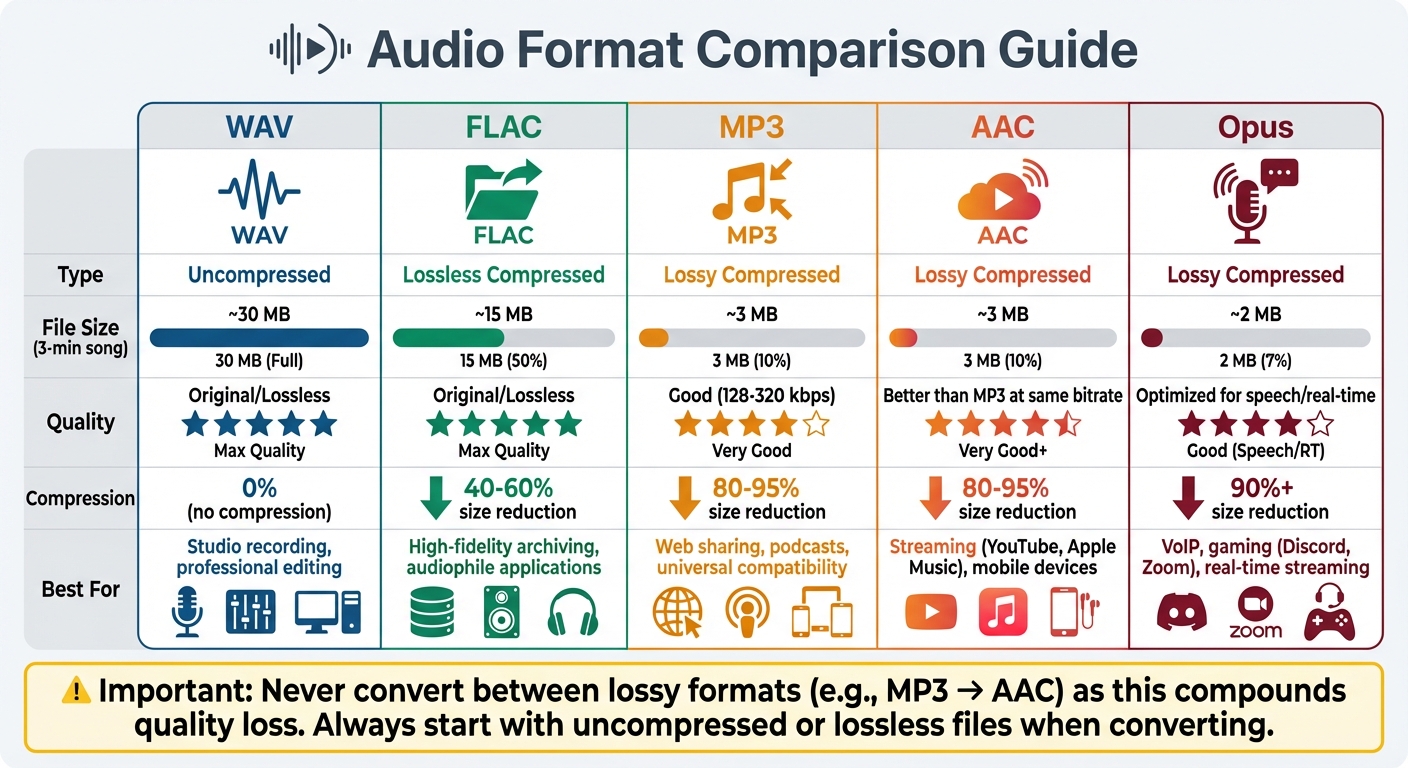
Audio formats fall into three main categories: uncompressed, lossless compressed, and lossy compressed. Each serves a distinct purpose.
Uncompressed formats, like WAV and AIFF, capture sound exactly as recorded using Pulse Code Modulation (PCM). A typical three-minute song as a WAV file takes up around 30 MB. These formats are essential for professional recording and editing, as they preserve every detail of the audio. WAV, developed by Microsoft and IBM, and AIFF, created by Apple, are now compatible across platforms.
Lossless formats, such as FLAC and ALAC, shrink file sizes by 40–60% without losing any audio data. When decoded, the audio remains identical to the original. As Podcastle explains:
"FLAC is pretty much the efficient version of WAV".
FLAC is open-source and supported by high-end audio equipment, while ALAC is tailored for Apple users. These formats are perfect for archiving music collections while conserving storage space.
Lossy formats, including MP3, AAC, and Opus, use psychoacoustic modeling to discard audio details that the human ear is less likely to notice. This method reduces file sizes by 80–95%. For example, a three-minute song that’s 30 MB as a WAV file shrinks to just 3 MB as an MP3. MP3 is universally compatible, making it ideal for podcasts and online sharing, while AAC offers better sound quality at the same bitrate, which is why platforms like YouTube, iTunes, and Apple Music prefer it. For real-time communication - like VoIP or gaming - Opus stands out for its low latency and high efficiency.
| Format | Type | Best Use Case | File Size (3-min song) |
|---|---|---|---|
| WAV | Uncompressed | Studio recording, professional editing | ~30 MB |
| FLAC | Lossless | High-fidelity archiving, audiophile applications | ~15 MB |
| MP3 | Lossy | Web sharing, podcasts, universal compatibility | ~3 MB |
| AAC | Lossy | Streaming (YouTube, Apple Music), mobile devices | ~3 MB |
| Opus | Lossy | VoIP, gaming (e.g., Discord, Zoom), real-time streaming | ~2 MB |
To better understand these formats, it's helpful to dive into how codecs work behind the scenes.
How Audio Codecs Work
Codecs are the technology that makes audio compression possible. They compress audio for storage and decompress it for playback. As Podcastle puts it:
"The format is the suitcase itself, and the codec is how you pack it - neatly rolled to save space or stuffed in loosely".
Lossy codecs exploit the limits of human hearing, which typically ranges from 20 Hz to 20,000 Hz. They remove frequencies that are masked by louder sounds or fall outside this range. For instance, human speech primarily occupies the 300 Hz to 8 kHz range, even though the ear can hear up to 20 kHz. This selective removal makes lossy compression effective for many listening scenarios.
Some codecs also use Joint Stereo encoding, which saves space by storing the average of the two channels (mid) and the difference between them (side), rather than storing left and right channels separately.
Another key factor is bitrate, which determines how much data is processed per second. For MP3s, 128 kbps is often used for speech, while 320 kbps is considered "near-CD quality" for music. Variable Bit Rate (VBR) encoding further enhances efficiency by allocating more data to complex audio sections and less to simpler ones.
When recording or editing, always start with the highest quality format. Compression can’t restore data lost during an initial lossy recording. Additionally, avoid converting between lossy formats (e.g., MP3 to AAC), as this compounds compression artifacts and degrades audio quality even further.
Getting Large Audio Files Ready for Conversion
Before diving into audio conversion, it’s essential to organize your files and ensure their integrity. These steps can save you time and headaches down the line.
File Organization and Naming Methods
Having a clear naming system makes batch processing and file management much smoother. For developers, using a file conversion API can further streamline these workflows. For multichannel audio, add suffixes like _FL, _FR, _FC, _LFE, _BL, _BR to identify individual tracks from split multichannel files (e.g., 5.1 surround sound). This approach eliminates confusion when handling multiple audio files.
Keep in mind that standard WAV files have a size limit of 4 GB. If your recordings exceed this, consider using extended formats like RF64 or Broadcast Wave Format (BWF). Alternatively, split the file into smaller, sequential segments. Since WAV files have limited metadata capabilities, store detailed information about the recording in separate text files.
Always keep an unaltered master file as a backup. This ensures you have a clean source in case your conversion settings don’t produce the desired results or if you need to convert to another format later on.
Once files are organized, the next step is to check for errors to avoid issues during conversion. You can also automate file conversions with n8n to handle large volumes of audio data efficiently.
Checking Files for Errors Before Converting
File verification is crucial to prevent wasted time and failed conversions. Here’s how to ensure your files are ready:
-
Use tools like
ffprobeto extract technical details without altering the file. For example:ffprobe -v quiet -print_format json -show_format -show_streams <file_path> -
Confirm that the metadata matches the file extension. For instance, converting a lossy format like MP3 to a lossless format like WAV won’t restore the original quality. As AssemblyAI explains:
"Simply converting a lossy audio type to a lossless audio type (i.e. mp3 to wav) will not add back any audio quality."
- Ensure the codec aligns with the file extension to avoid format errors.
- Verify the channel count. Whether the file is mono (1 channel), stereo (2 channels), or multichannel (6 channels for 5.1 surround), accurate channel configuration is essential. If you’re preparing audio for speech-to-text applications, splitting stereo or multichannel files into mono tracks can improve transcription accuracy.
Listening to sample segments with high-quality headphones is also important. Automated tools might miss issues like background hiss, clipping, or digital distortion - problems that conversion can’t fix and will persist in the output files. For speech-focused projects, aim for a 16 kHz sample rate and 16-bit depth. This strikes a good balance between file size and clarity. However, remember that up-sampling a low-quality file (e.g., converting 8 kHz to 44.1 kHz) won’t recover lost frequency details; the recording’s original limitations will remain.
Here’s a quick reference table to guide your checks:
| Metadata Field | What to Verify | Why It Matters |
|---|---|---|
| codec_name | Matches the file extension (e.g., pcm_s16le) |
Avoids "invalid format" errors during conversion |
| channels | 1 (Mono), 2 (Stereo), or 6 (5.1) | Ensures correct channel configuration |
| sample_rate | Commonly 16 kHz, 44.1 kHz, or 48 kHz | Prevents unrealistic expectations from up-sampling |
| bit_rate | Matches expected quality (e.g., 1,411 kbps for CD audio) | Indicates if prior lossy compression has occurred |
sbb-itb-ba72479
Converting Large Audio Files with ConvertHub
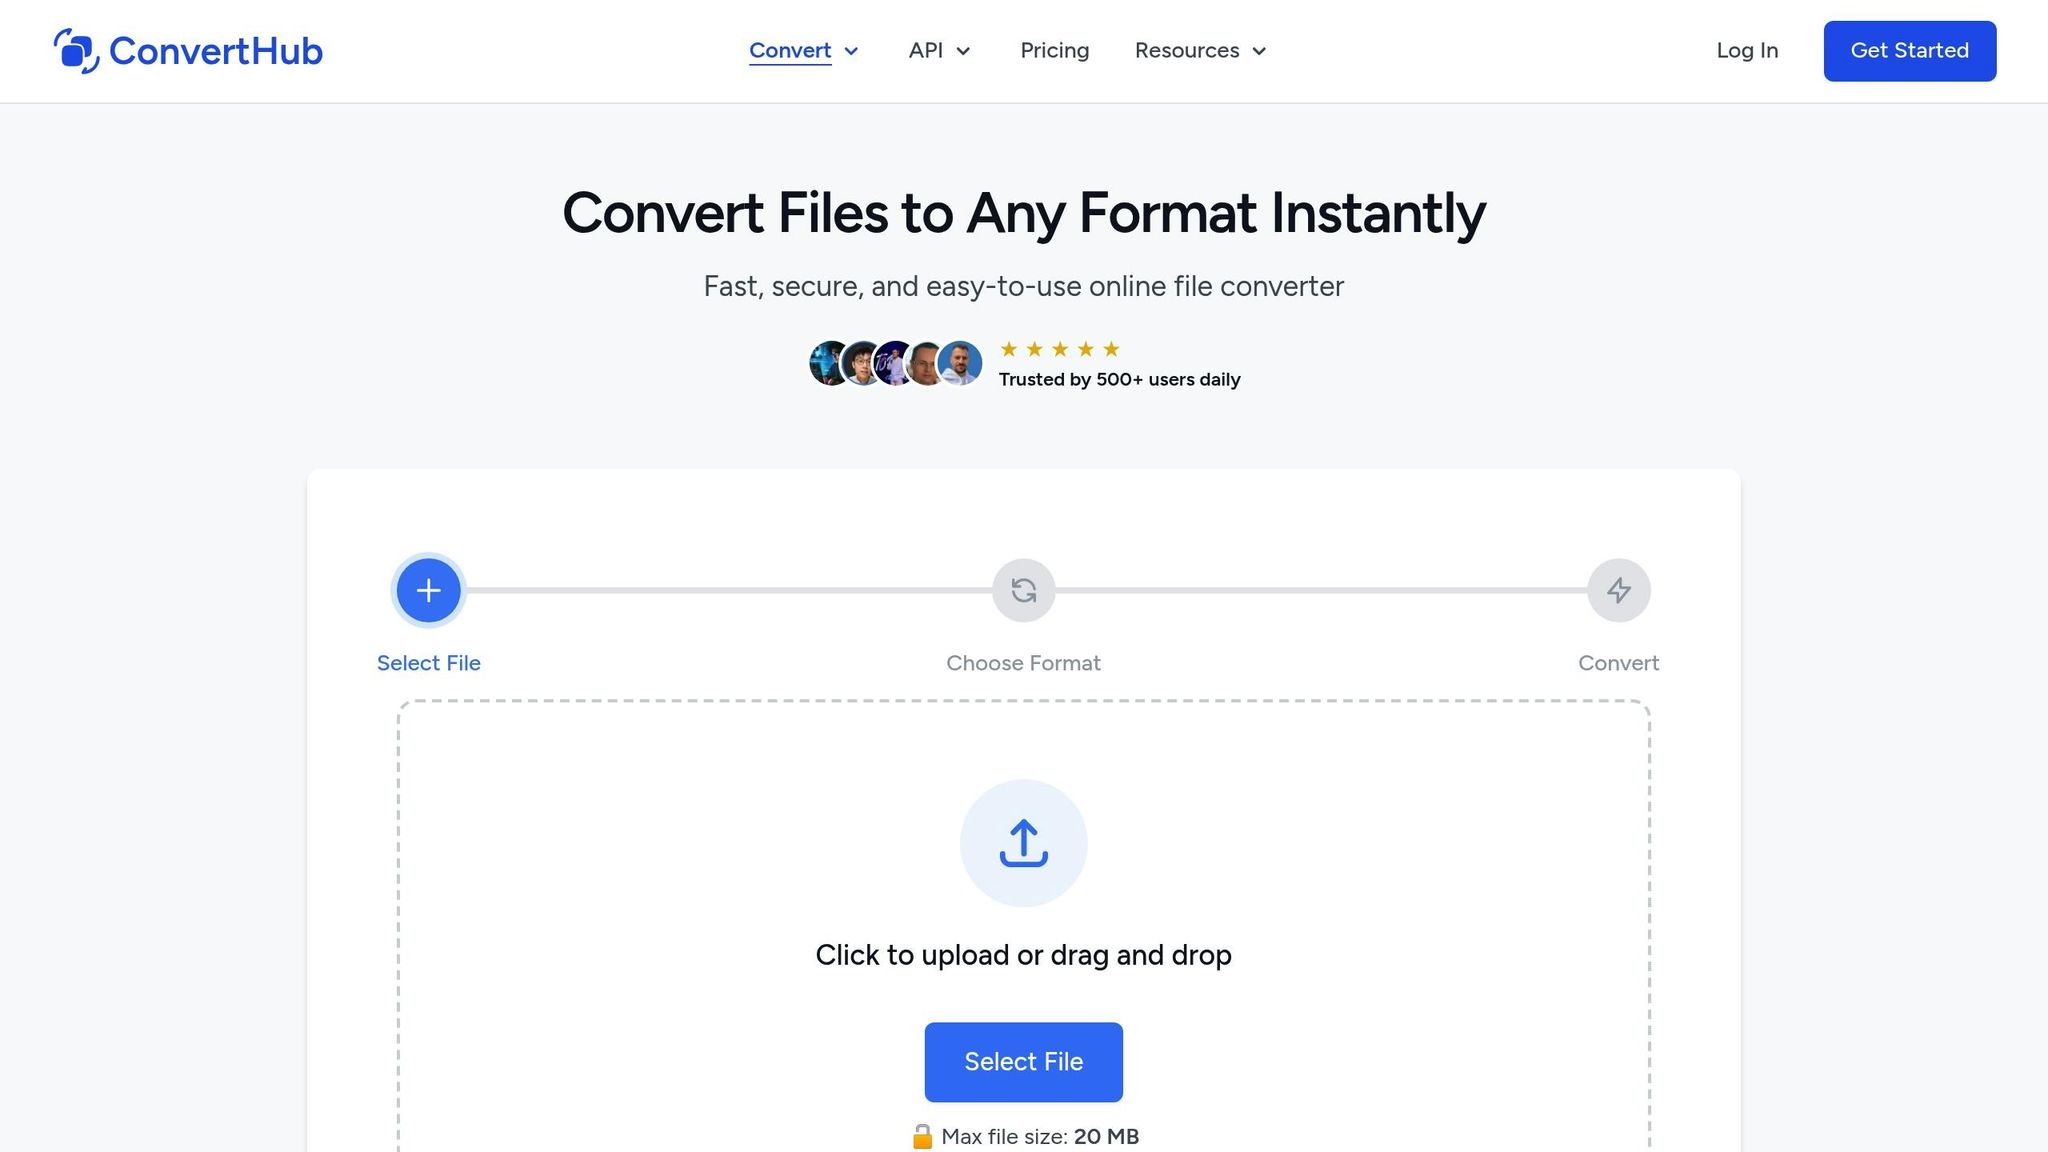
Once your files are verified, ConvertHub makes the conversion process smooth and hassle-free. It allows you to convert large audio files directly in your browser, with support for files up to 2GB for subscription users. Below, we’ll explore the platform's features and outline the steps to efficiently convert audio files.
ConvertHub Features for Audio Conversion
ConvertHub supports over 800 format combinations, including more than 30 audio formats like MP3, WAV, FLAC, AAC, OGG, M4A, and AIFF. Your data is protected with 256-bit SSL/TLS encryption, and files are stored securely in ISO 27001 certified data centers, ensuring top-tier privacy and safety.
Key features include:
- Batch Processing: Upload multiple files simultaneously and download them as a single ZIP archive.
- Customizable Settings: Adjust bitrate, sample rate, and quality presets to find the perfect balance between file size and audio fidelity.
File size limits depend on your account type:
- Guest Users: Up to 20MB per file.
- Free Registered Users: Up to 50MB per file.
- Pay-as-you-go Users: Up to 500MB per file.
- Subscription Users: Up to 2GB per file.
Subscription plans start at $9/month for 300 credits, while pay-as-you-go options begin at $10 for 200 credits. Files larger than 50MB will use three times the usual credit amount, so it’s a good idea to check the credit cost before converting larger files.
How to Convert Large Audio Files on ConvertHub
The conversion process is simple and involves just three steps:
- Upload Your File: Drag and drop your audio file or use the file selector. ConvertHub uses chunked uploads to handle large files reliably.
- Choose Your Settings: Select the target format and fine-tune settings like bitrate, sample rate, or quality presets. The platform will display the credit cost before you proceed.
- Start the Conversion: Hit "Convert" to begin. ConvertHub processes files asynchronously, so you don’t have to wait around. For very large files, you can enable email notifications to get an alert when the conversion is done.
Once the status changes to "Completed", you can download your file. If you’ve processed multiple files, they’ll be available as a ZIP archive. Free users’ files are automatically deleted after 24 hours, while paid users can delete files manually for extra privacy.
Converting Multiple Large Audio Files at Once
Why Batch Processing Saves Time
Converting dozens - or even hundreds - of large audio files one by one can feel like an endless chore. That’s where batch processing comes in. Instead of working through each file individually, batch processing tackles them all at once, with the total time determined by the longest single file in the batch.
The time savings are impressive. As Kelsey Foster from AssemblyAI puts it:
"The architecture processes unlimited files simultaneously, with total completion time determined by your longest individual file rather than the sum of all files".
For example, if you’re processing 1,000 files that each take 30 minutes to convert, the entire batch could be done in just 10–15 minutes. Similarly, converting 100 one-hour files might take only 15–20 minutes.
Batch processing also simplifies repetitive tasks. You only need to set your format preferences once for the entire batch. The system takes care of file naming, applies consistent quality settings, and even packages everything into a single ZIP file for easy downloading.
Next up, let’s explore how ConvertHub makes this process even easier for large audio files.
Using Batch Conversion on ConvertHub
ConvertHub's batch processing feature is available exclusively to paid users - either through subscription plans or pay-as-you-go credits. What makes this feature so handy for large audio files is that you can queue multiple files at the same time without needing to monitor each one. The platform automatically manages the workload, ensuring efficient processing across the entire batch.
Before starting, double-check your account’s file size limits and be aware of credit cost adjustments for files over 50MB. For instance, if you’re on the $9/month plan with 300 credits and want to process 50 large files, make sure you’ve got enough credits to complete the batch without interruptions.
Common Mistakes When Handling Large Audio Files
Conversion Errors to Avoid
One common mistake is attempting to upsample lossy files. For instance, converting an MP3 file to a lossless format like WAV won’t magically recover the data that was already lost. All you’ll get is a larger file with the same quality issues.
Another error is renaming file extensions, such as changing .mp3 to .wav, without actually transcoding the audio. This doesn’t change the file’s format and can lead to metadata mismatches, potentially causing crashes in professional tools or errors during processing.
Deleting the original files after conversion is also risky. These files might be essential for troubleshooting synchronization or quality issues later on.
Over-processing audio is another pitfall to avoid. Applying filters like noise reduction, automatic gain control, or echo cancellation before conversion can backfire. These filters often reduce transcription accuracy because AI models are designed to work with raw, unaltered audio. In fact, poor format choices combined with excessive filtering can lower transcription accuracy by as much as 15–30% compared to using optimal settings.
These issues highlight the importance of verifying and organizing files properly, as discussed in earlier sections.
Best Practices for Managing Large Audio Files
To avoid these pitfalls, it’s crucial to implement meticulous file management practices.
Start by verifying file metadata using tools like ffprobe. This helps you confirm the codec, sample rate, and bit depth of your audio files. For speech-to-text applications, standardize your files to a 16 kHz sample rate, mono (1 channel), and a 128 kbps bitrate. As Patrick Loeber, Senior Developer Advocate at AssemblyAI, explains:
"Audio format directly impacts speech-to-text accuracy because different formats preserve varying levels of audio detail that AI models need to recognize speech patterns".
If you’re working with video files but only need the audio, use FFmpeg to extract the audio stream. This reduces file size and speeds up upload times. There’s no point in converting unnecessary video data when you’re only focused on the audio.
For managing multiple large files, tools like ConvertHub’s batch processing feature can save time. It automates format conversions while maintaining consistent quality settings across your entire batch, making the process more efficient and less error-prone.
Conclusion
This guide has walked you through reliable strategies for managing and converting large audio files without compromising quality or efficiency. The key lies in making smart decisions about formats, tools, and workflows to avoid issues like quality loss, compatibility errors, or unnecessary delays.
For professional recording or archiving, lossless formats like WAV and FLAC are ideal. If reducing file size is your goal - such as for web or mobile use - lossy formats like MP3 or AAC are better suited. When working on speech-to-text tasks, using a 16 kHz sample rate and 16-bit depth strikes the perfect balance, capturing essential details without creating overly large files.
To maintain audio quality, always double-check your metadata and avoid unnecessary preprocessing steps. For instance, converting lossy files to lossless or overusing noise reduction can degrade the final output. In fact, poor format choices can lower transcription accuracy by as much as 15% to 30% compared to optimized formats.
When it’s time to convert your audio files, ConvertHub simplifies the process. With support for over 800 file formats, batch processing, and secure 256-bit encryption, it’s a one-stop solution for handling large audio files while preserving quality. Visit ConvertHub to manage your conversions with ease and precision, all in one place.
FAQs
What’s the best way to reduce the size of large audio files without losing quality?
To shrink large audio files without sacrificing quality, you can rely on a few practical methods:
- Switch to a compressed format: Converting formats like WAV or AIFF into MP3 or AAC can dramatically cut file size while keeping the audio quality nearly intact.
- Tweak the bitrate: Lowering the file's bitrate reduces the amount of data processed per second, resulting in a smaller file. Just be mindful to strike a balance that keeps the sound quality acceptable.
- Downsample the audio: Decreasing the sampling rate or bit depth can also help reduce size. However, this method requires caution, as it can impact the audio's clarity.
If you're looking for lossless compression, formats such as FLAC or ALAC can compress files while preserving the original quality. Keep in mind, though, that the size reduction won't be as dramatic as with lossy formats. Ultimately, it's all about finding the right trade-off between file size and audio quality to suit your specific needs.
What are the best audio formats for streaming or archiving purposes?
Choosing the best audio format boils down to how you plan to use it - whether for streaming or archiving.
If you're focusing on streaming, go for compressed formats like MP3 or AAC. These formats shrink file sizes while keeping sound quality intact, making them ideal for smooth online playback and ensuring they work seamlessly across most devices.
On the other hand, for archiving or professional editing, lossless formats like WAV, AIFF, or FLAC are the way to go. These formats retain the original audio quality without any compression, making them perfect for long-term storage or detailed post-production tasks.
When choosing a format, think about your specific needs: Is audio quality your top priority, or is saving storage space more important? Picking the right format ensures your audio delivers the performance you’re looking for.
Why should you avoid converting between lossy audio formats?
Converting between lossy audio formats can lead to a noticeable decline in sound quality. This happens because formats like MP3 or AAC achieve smaller file sizes by cutting out certain audio details. When you switch from one lossy format to another, the compression process repeats, stripping away even more sound details and further reducing audio fidelity.
For the best sound quality, it's better to convert from a lossless format (such as WAV or FLAC) to a lossy format. Alternatively, stick with the same lossy format and avoid re-encoding whenever you can.